Astro-projekt
At this site I write about my astronomy projects. In the summer 2006 I finished construction of my observatory. And in the summer 2007 I will build a telescope.
| Next | Previous | Random | List Sites Next 5 | Previous 5 | Join |
21. november 2007: The 10" telescope
Now I have finished my telescope. The prime mirror is mounted in the telescope, the secondary mirror and the ocular is mounted too. But I got two problems:
1. I ordered a new 40 mm. secondary mirror, but my suplier have not got it and send it to me yet. So I have used an old 30 mm. secondary mirror from a 6" newtonian. It is acceptable, but not good enough. I still waiting for the 40 mm. secondary mirror.
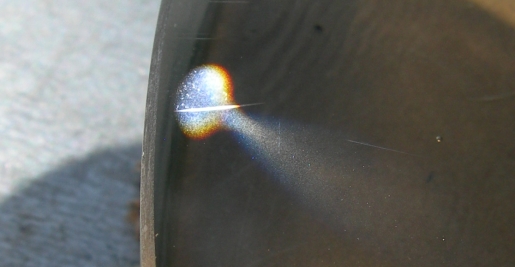
2. The next problem is more difficult. When the mirror returned from aluminizing I discovered a kind of ring near the edge of the mirror. I think it is a problem from the polishing phase. See the Youtube-video from the link below.
In spite of theese problems I have tested the telescope with a 25 mm. Kelner ocular. The stars was sharp, I could see many double stars and other details. I just need to align my viewfinder, before it will be posibly to determine which star and their magnitude I can see.
At Youtube.com I published a video with my telescope, see this link: My first telescope .
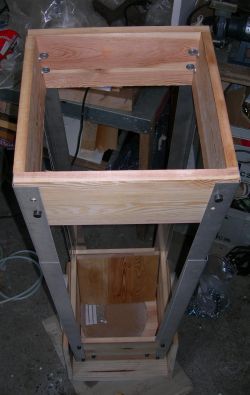
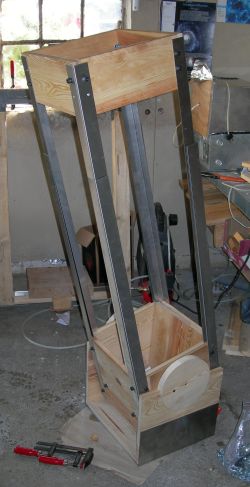
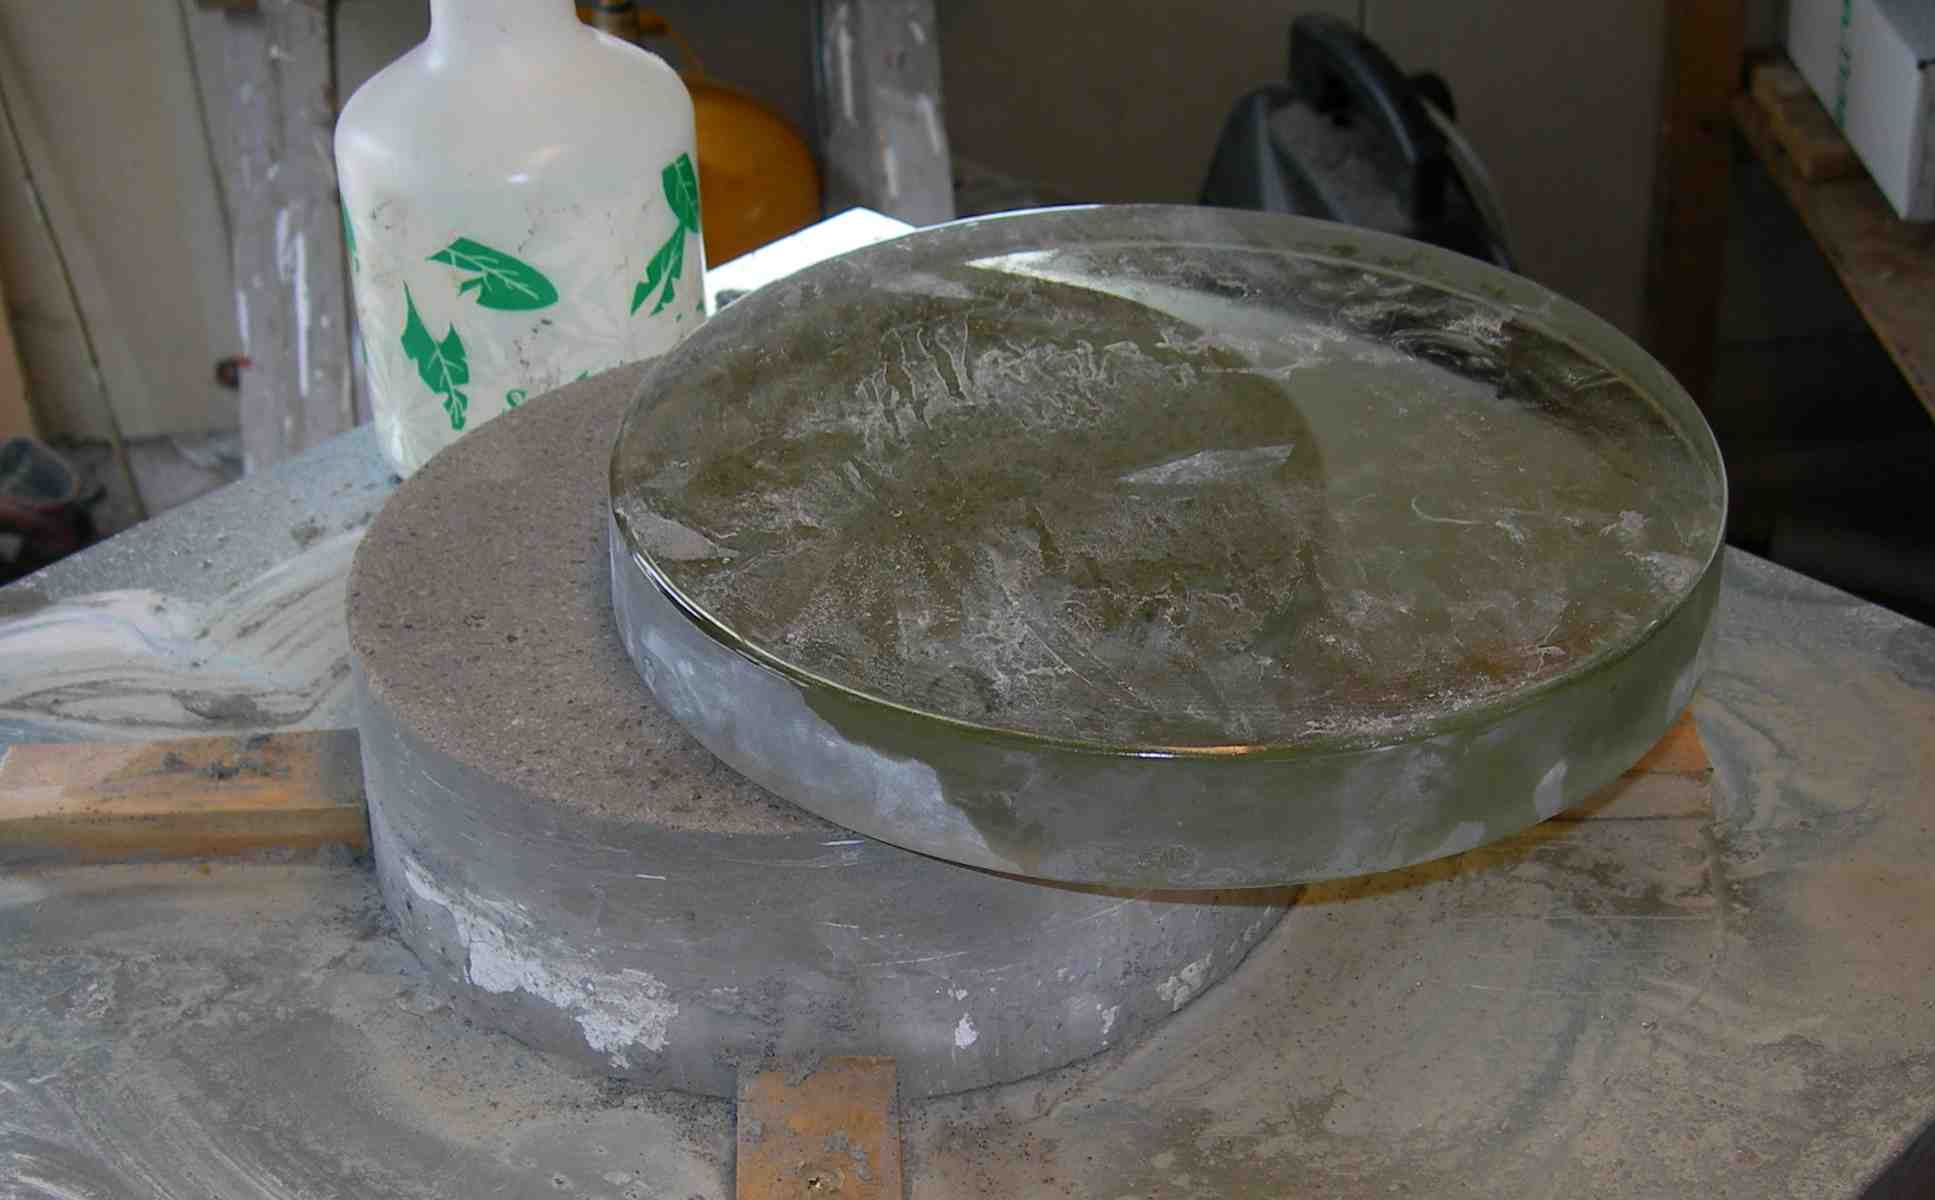
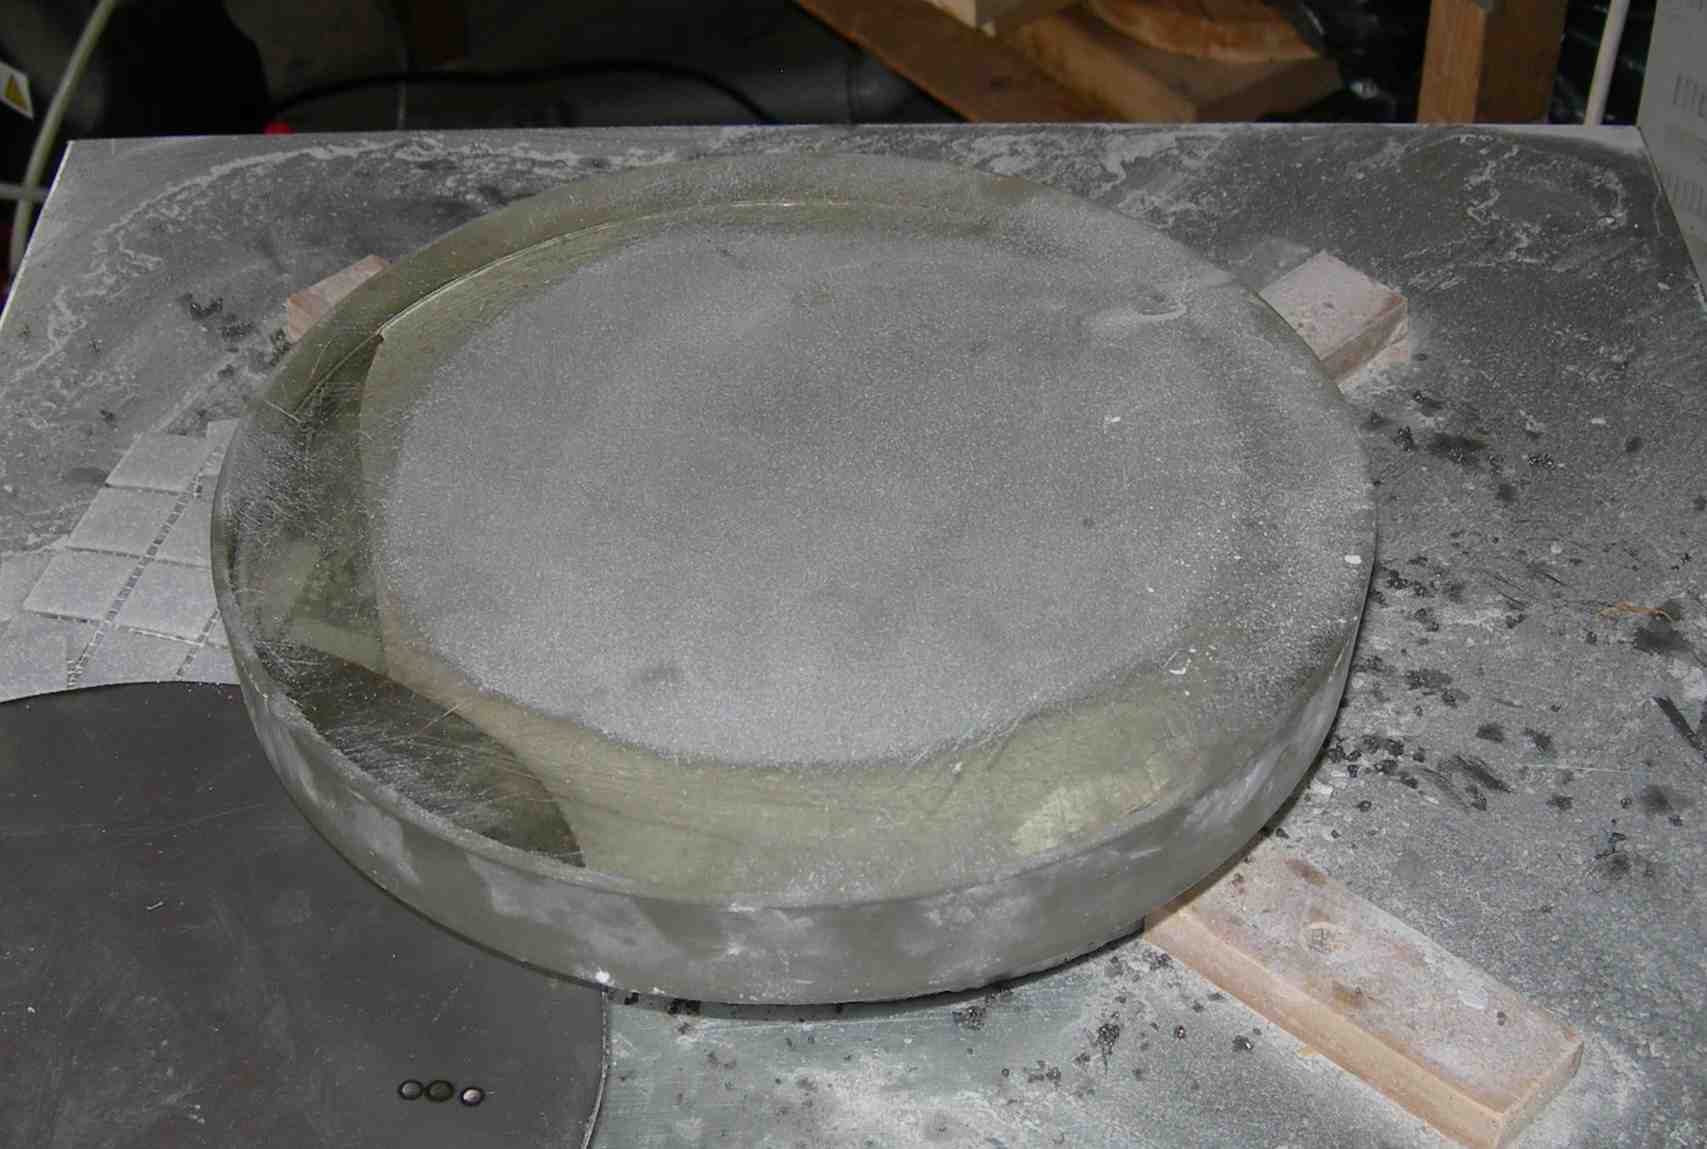
22.september 2007: Mounting - Dobson
The miror is send for aluminising and while I wait for the mirror to be returned the mounting is constructed. A Dobson-mounting have I made as you can see at the pictures below:
16. september 2007: Starparty
This weekend an astro-club in Jylland arranged a starparty. 58 proffesionel and amateur astronomers went outside a little town named Ejstrupholm. Work shops, introductions, discusions, activities and much other was arranged for the two days.
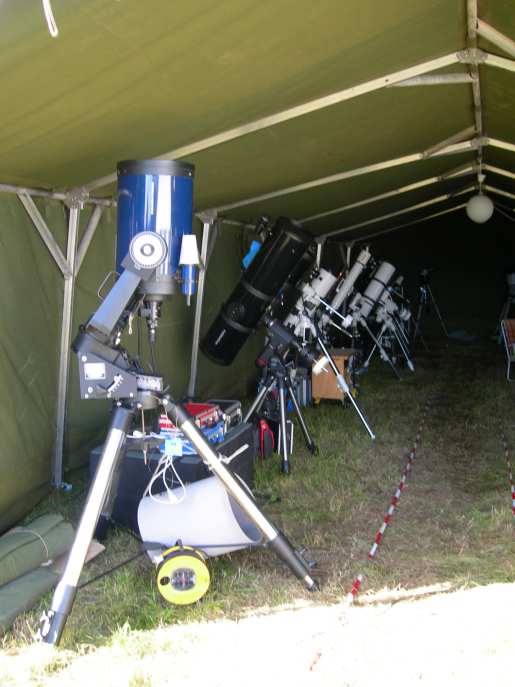
Telescopes and equipment ready for use. Friday evening and night the weather was fine for observing.
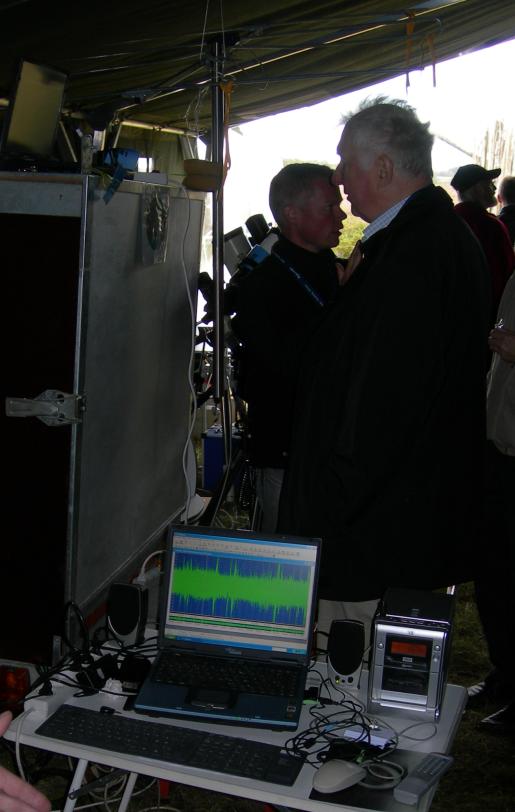
Radio astronomy was also represented at Ejstrupholm.
Jens Jakobsen show how to grind a mirror.
Thanks to Midtjysk Astronomiforening for organizing a succesful starparty.
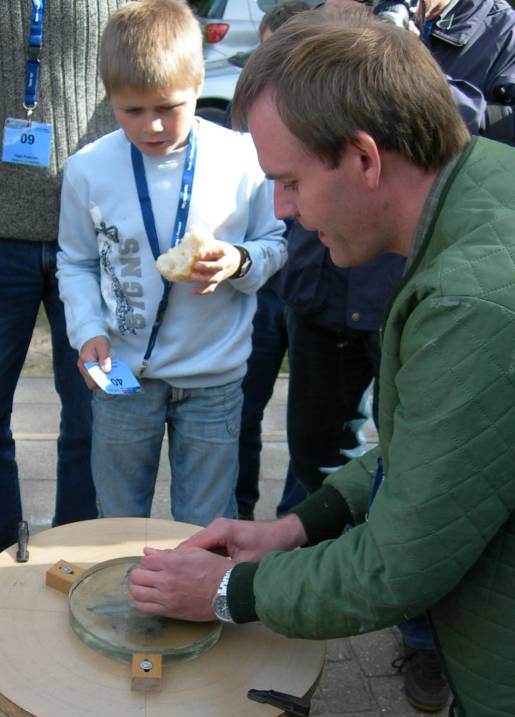
15. august 2007: Mirrortest
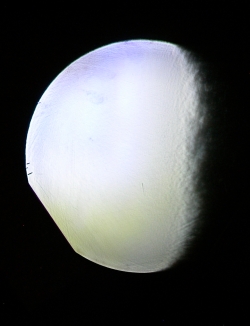
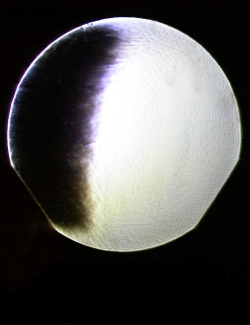
I have polished the mirror and now it's time for testing the surface. The foucaulttest consist of a lightsource also called the artificial star placed in radius of cuvature (two times focuslength). By refracting the light inside and outside focus it is possibly to analyzing the surface. The light source is in radius of curvature 3 cm. left from center axis, digitalcamera in focus right to center axis and the knife-edge moves from right to left.
With my little digitalcamera the mirror makes these images in foucaulttest:
When testing the focal plane the lightsource is placed in radius of curvature, a white screen is placed in focus and by moving the light, I testing the focuslength is equal on different points on the mirror. The test is repeated 5, 10, 15 and 20 cm. from optic axis and the mirror is also turned arround five times, approximately 72 degrees each time. The test showed that focuslength is uniform and therefore the image is formed on a curved focal surface.
The miror was also tested for astigmatism. If there is astigmatism the image out of focus will be eliptical and not round. And the eliptical images (inside and outside focus) will be right angles to each other. With the white screen inside and outside the focal plane I could not registrate any astigmatism.
With an eyepiece in focus the mirror is tested for represent the artificial star sharp and distinct. The test was excellent - the artificial star was represented very fine.
Ripple surface was controlled by visuel test and the mirror was accepted.
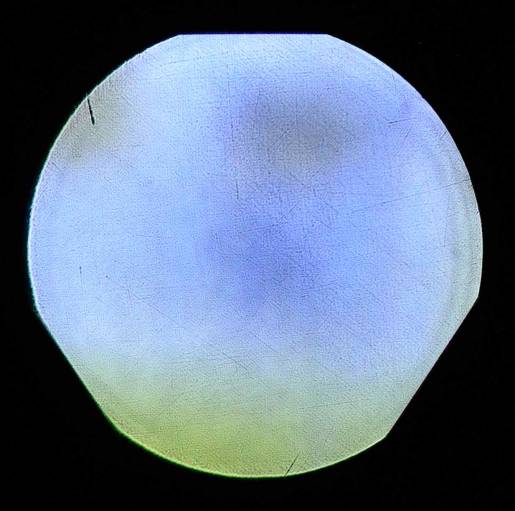
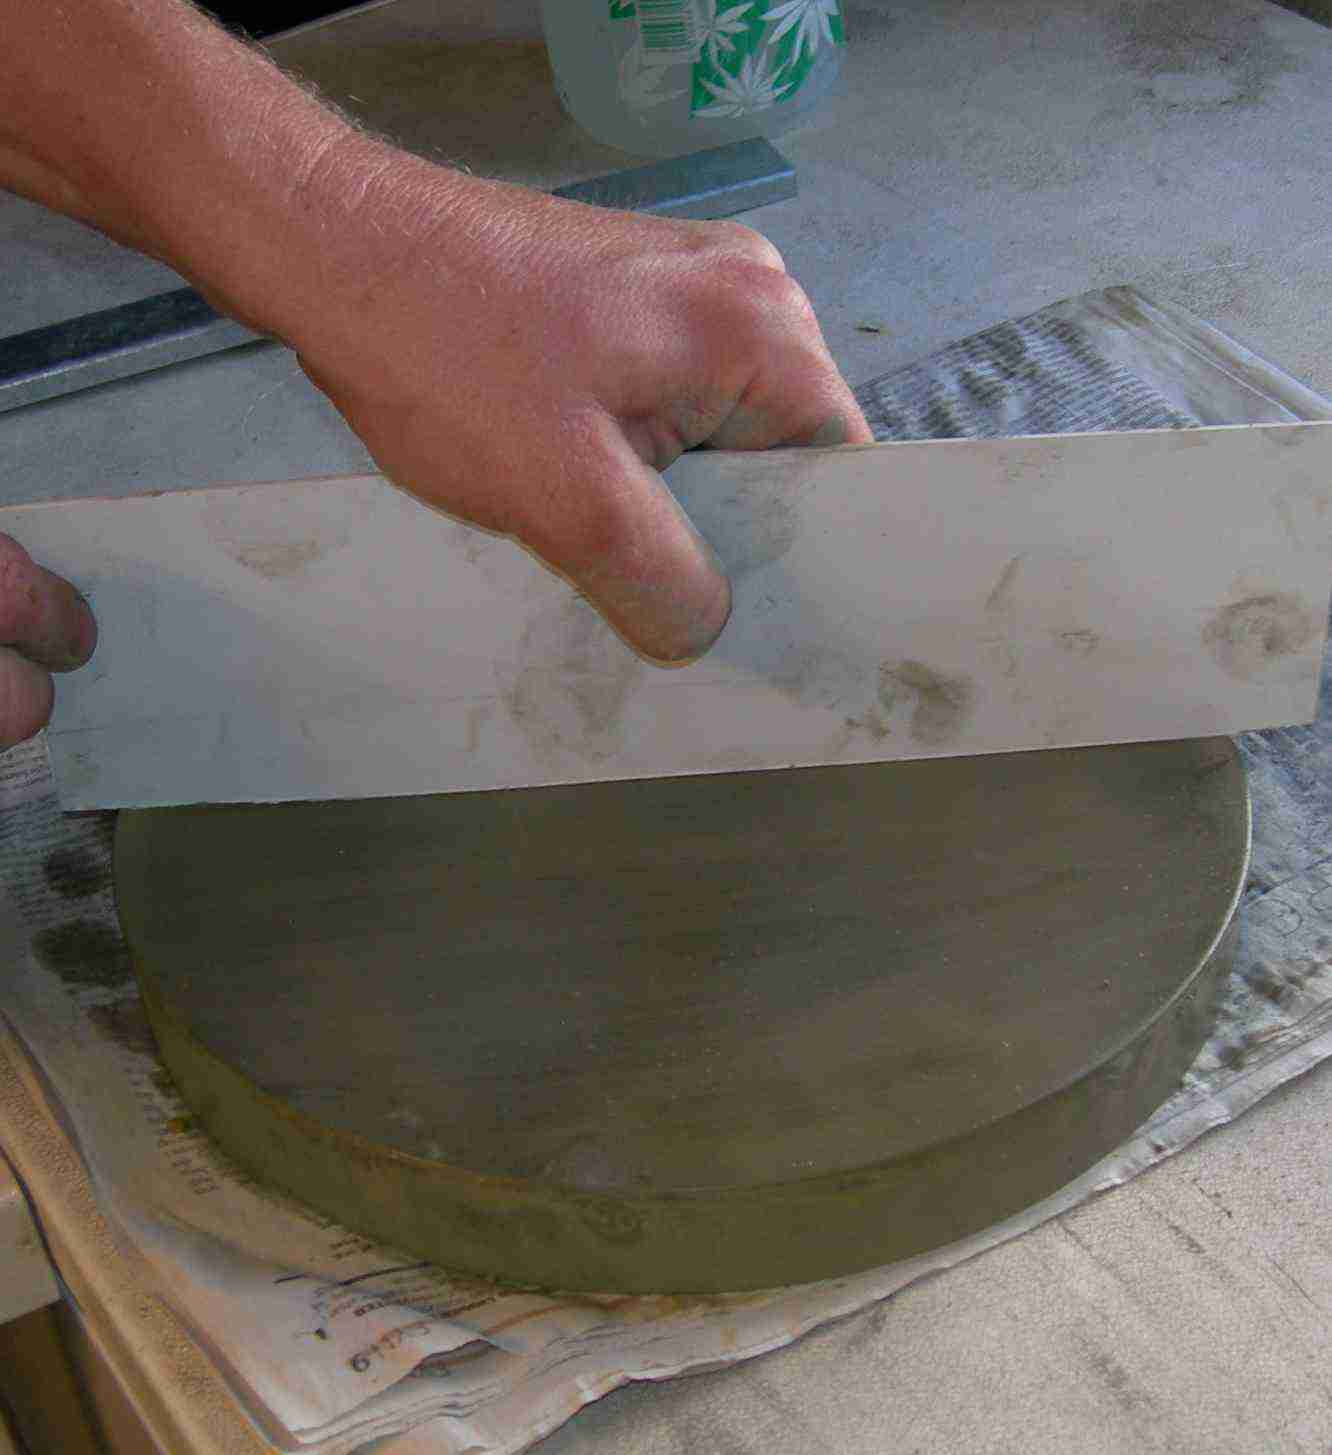
The last test is test of polishing. Light from the sun concentrated by a magnifying glass controle the surface. If the surface make different kind of reflections then the mirror is not polished enough. I decided to polish 30 minutes more and then it got a smooth and well-polished surface. At the image below you can see how I check up the surface, here there is a little scratch:
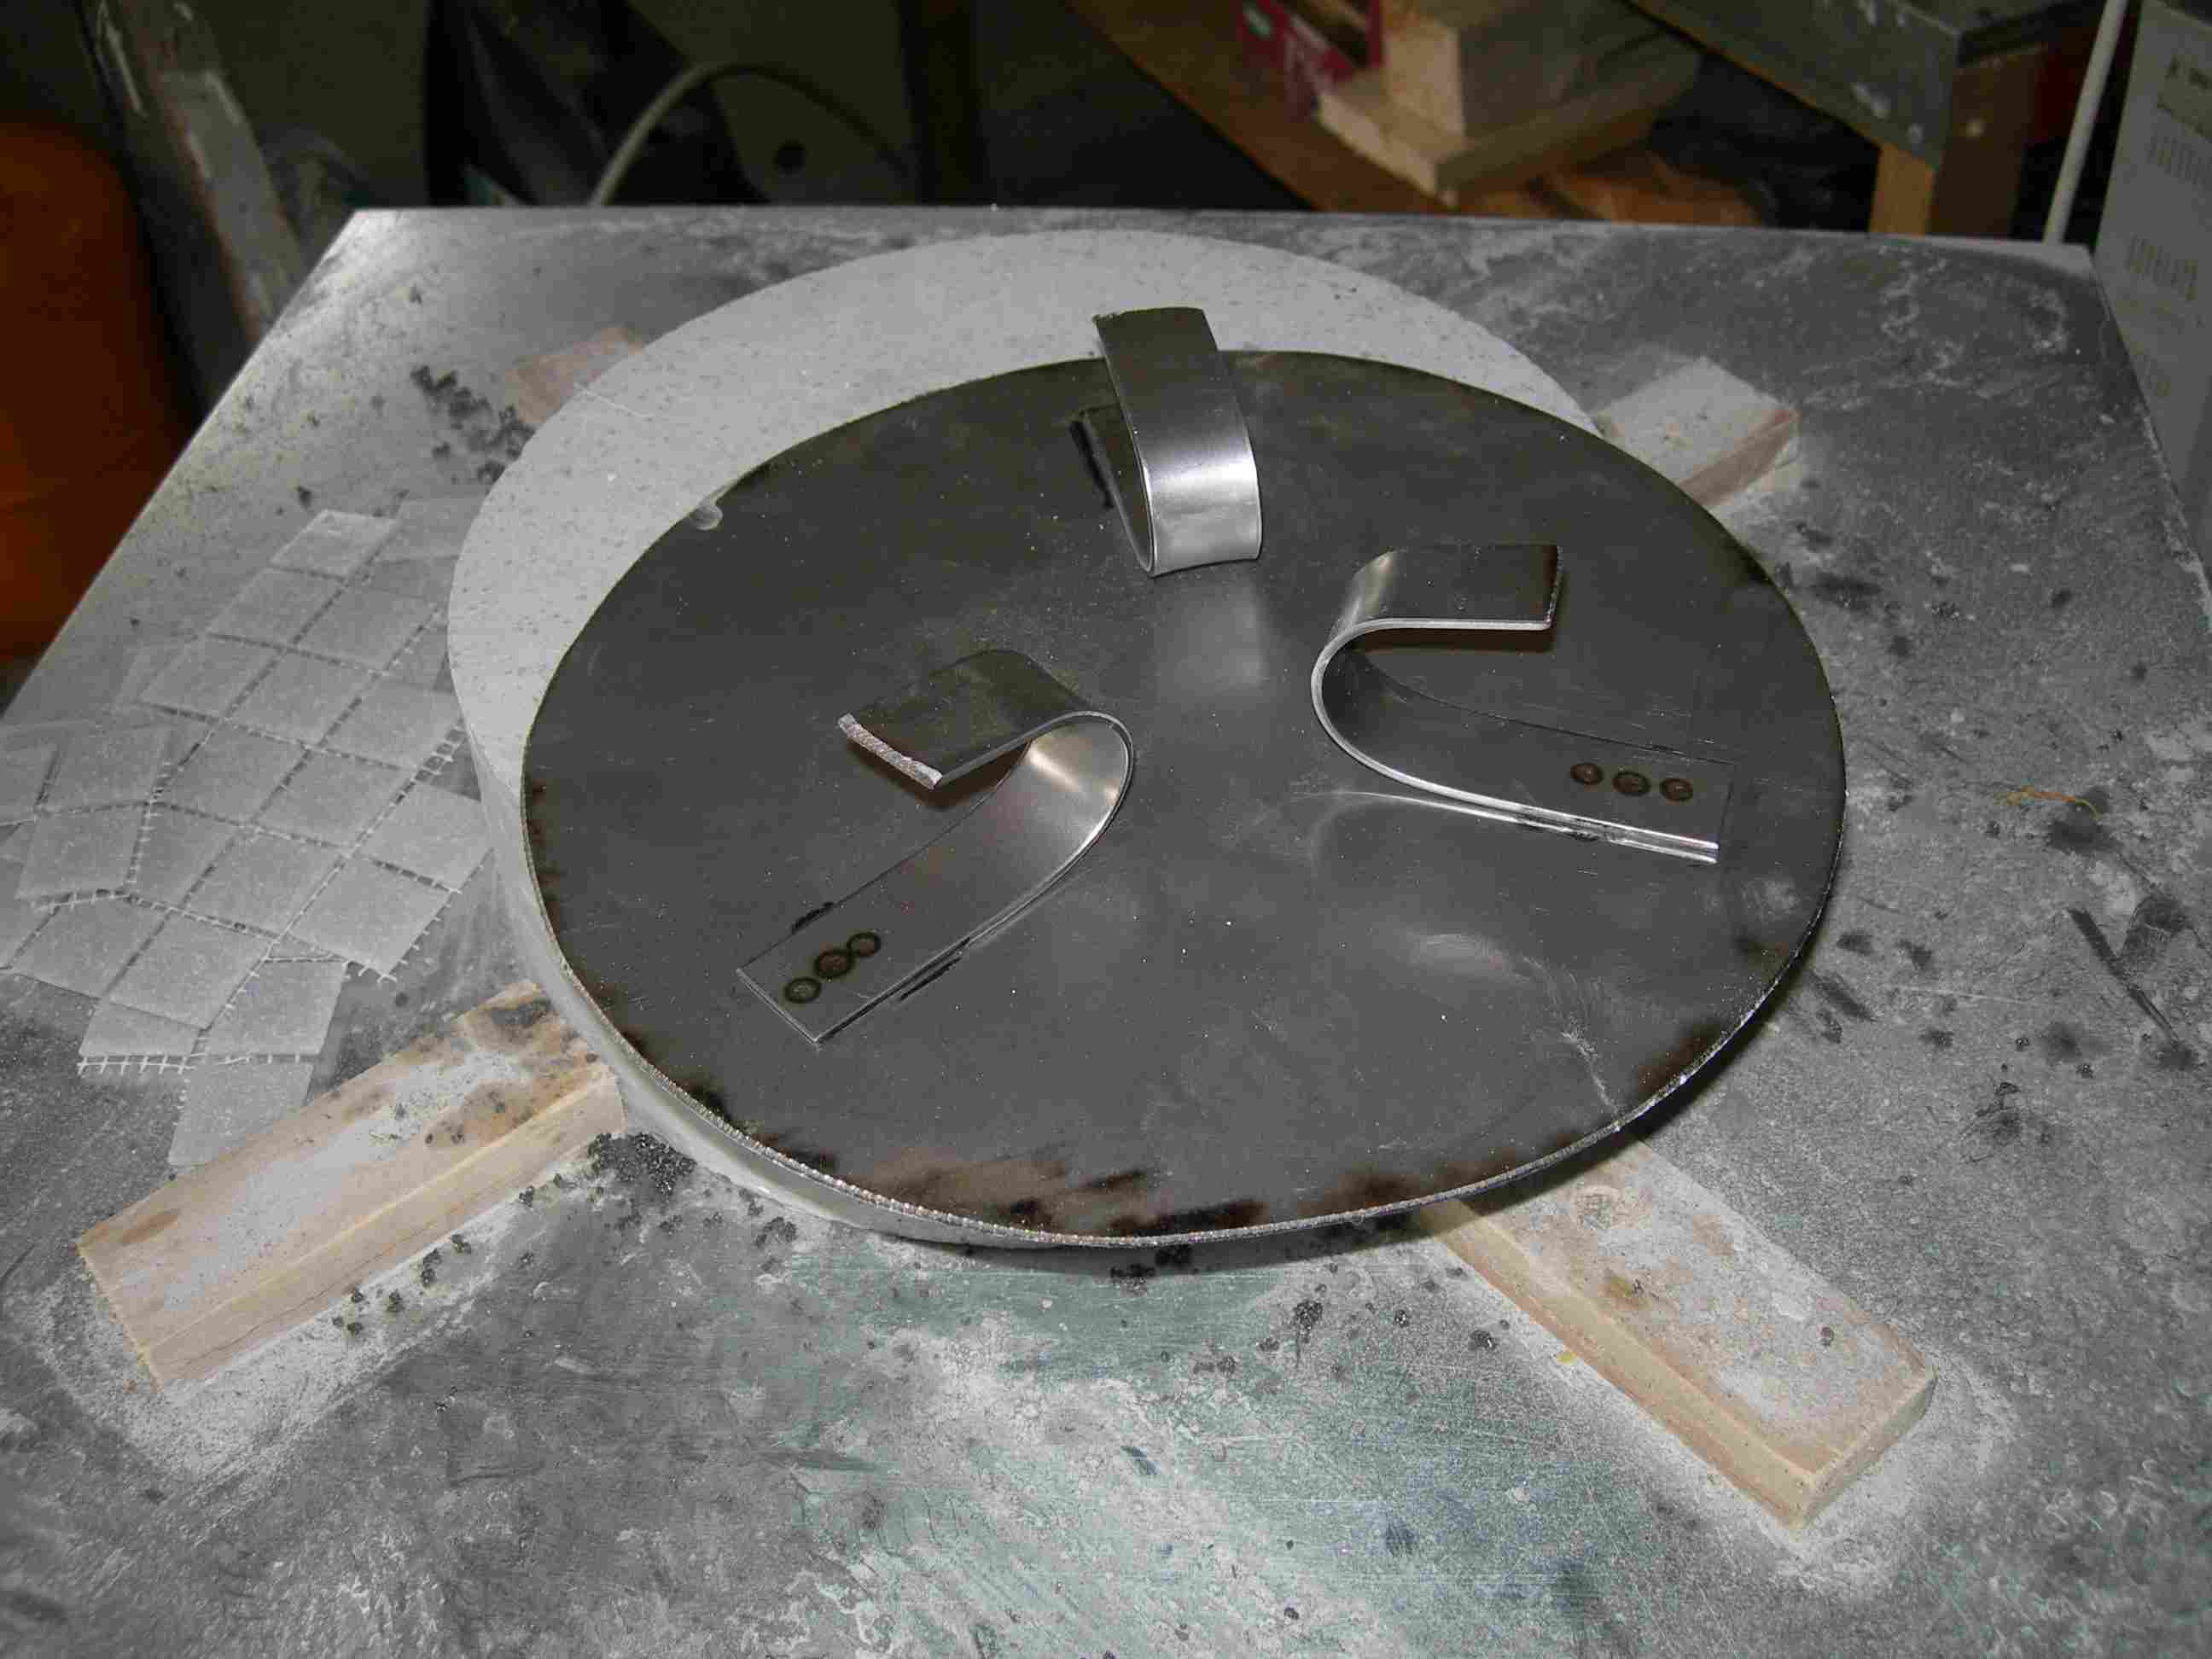
I have contacted Vacuum coatings, maybe they shall aluminize my mirror. In the meantime I will construct the tubus and mounting (Dobson).
19. juli 2007: Mirror polished and first test - Foucault
The mirror is now polished and ready for being tested first time. When I saw the artificial star first time I was very fascinated, alle that work and the little faint star was reflected quite sharp on a white screen at the focal fix point. The radius of curvature was measured to 2370 mm, the focal length is then 1185 mm and the F-number is f:4.7. Pictures of the polishing lap, testbench and the testresults is inserted here:
The scratch up in left corner and the dark area too means I probably have to return to grinding with carbo320. There is a dark area in the center and also just above the center. Near the edge below there is a yellow zone. And the surface have faint schratches. I hope some ATMs with experience will comment these test-pictures.
Here is a picture showing how the mirror is mounted under the test.
The artificial star is placed 291 cm. (twice the estimated focal length) from the surface of the mirror. And moved 5 cm. right to the center of the curvature of radius. I also tried the slitless-method, but it was a little complicated to make the slit sharp enough. When my holidays is over (two weeks yet) I try to make a slitless-tester at work.
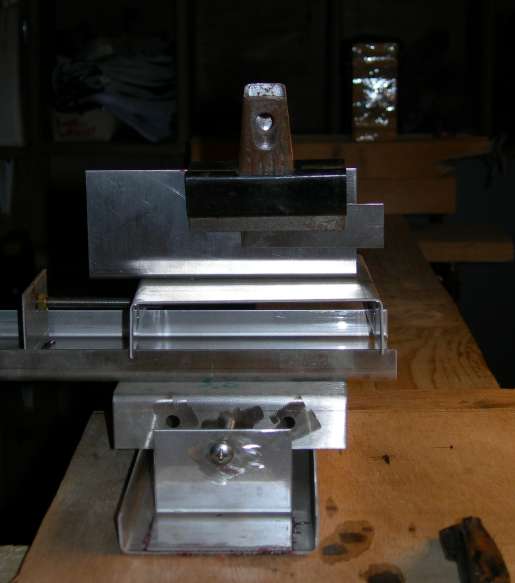
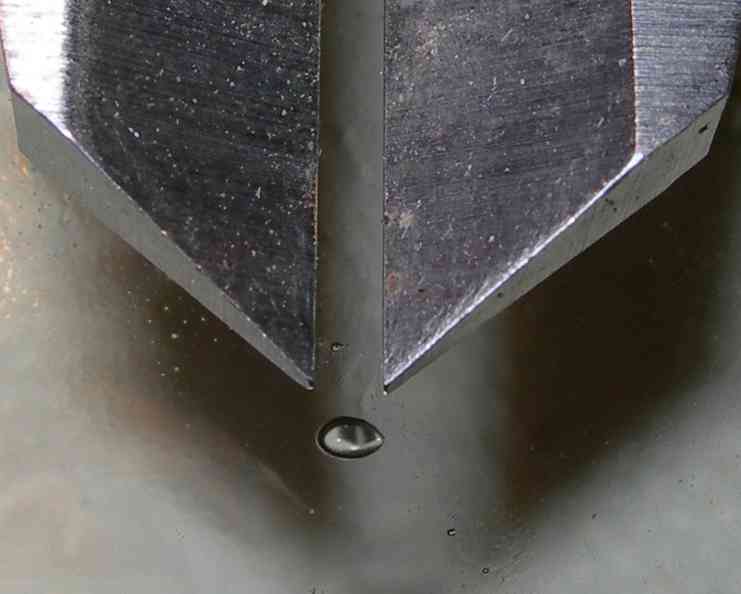
This knife-edge-device is a prototype which isn't finished yet. It is moveable along the center and acros the center of the light-cone. In the background is the artificial star.
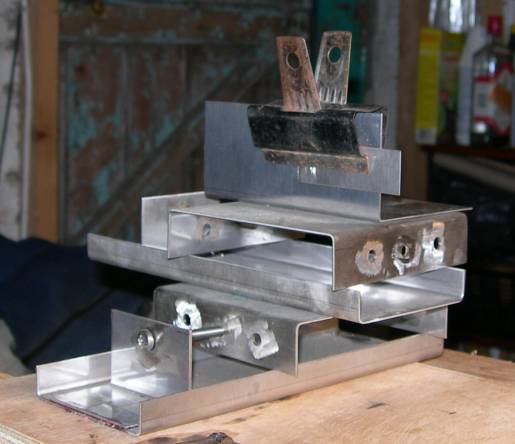
The knife-edge one more time.
The polish lap is made by pitch, wich is melted and formed in a mould. The lap is used with cerium oxide and was very effective. The pitch have to fill out the whole lap, and have to be more uniform and regular.
15. july 2007: Grinding to much and making a new the tool
Rough grinding have been a little complicated. I was recomended to increase the weight and used a heavy stone up on the mirror durring the rough grinding. And then it went fast and easy - a little to much fast and easy. I hollowed out 4 mm. and it is 1.1 mm. to much. The order of tool and mirror was changed, the mirror down and the tool up. And the sagitta went 3.3 mm. which is acceptable.
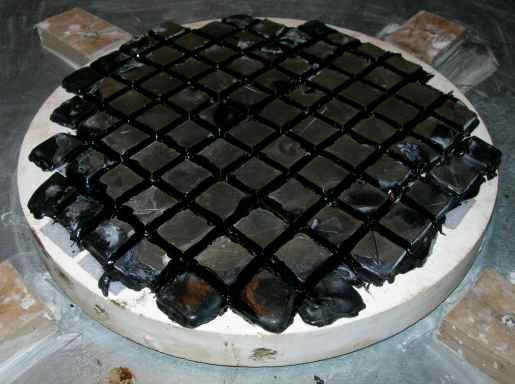
A new tool is constructed by stone cast plaster and tiles. The tool is a little konvex as shown in the picture:
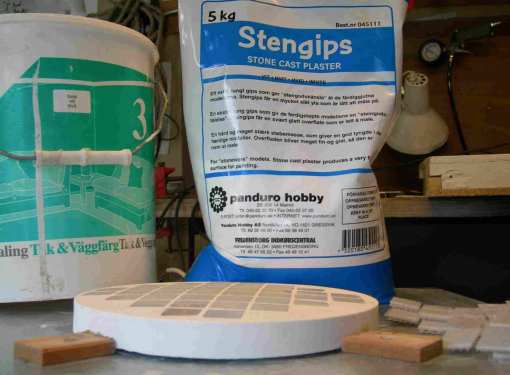
But the konvex shape was not very smart. I couldn't control the grinding and the mirror went hollowed out again. A new and plane tool was constructed and then I was able to control the grinding proces. Now the mirror have the right shape and a sagitta at 3.2 mm. which is 0.3 mm to much, but it is acceptable and grinding is continued with next kind of abrasive.
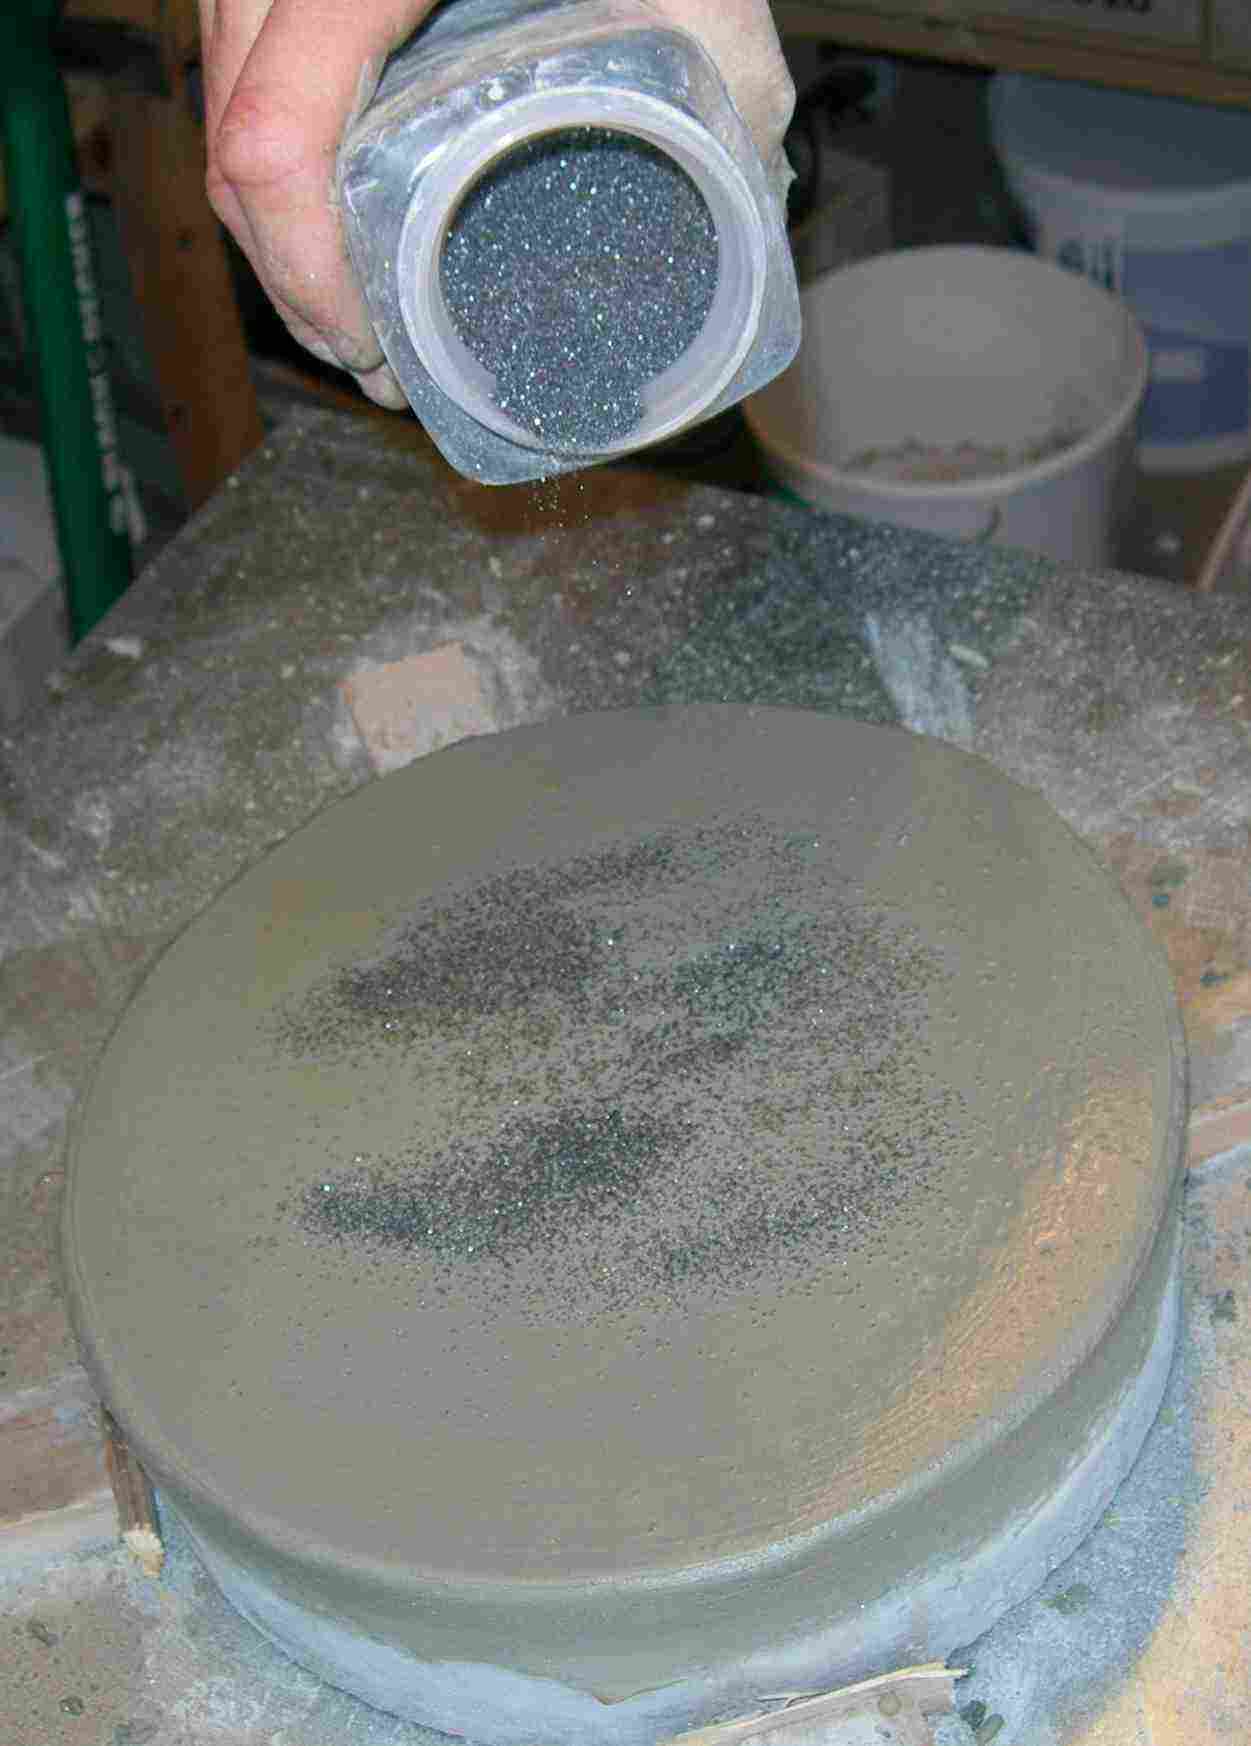
The purpose of the grinding proces is not to hollowing out anymore. The shape is approximately as it have to be and I'm ussing silicon carbide 80, silicon carbide 120, silicon carbide 220 and silicon carbide 220. For every shift of abrasive, the tool, mirror and workbench is cleaned carefully.
The grinding strokes used now is a W-stroke , it is a to-and-from-movement like a W. See this movie-clip (the strokes is to long, I make a new movie next time I grind a mirror):
Movie finegrinding
The grinding proces is splitted up in trhee steps:
Rough grinding with iron-tool, the mirror just have to be hollowed out. Using strokes-on-the-edge and carbo60 and coabo80. Sagitta have to be +- 10%. Time spending on grinding: 6 hours.
Fine grinding with a tool constructed by glass-tiles or ceramic-tiles. The aim is to make small corrections at the shape of the mirror otherwise the surface have to be smooth. Using W-strokes and carbo120, carbo220, carbo320, emery 125E and emery 50E. Fine grinding finished when foucaulttest is OK. Spending 6 hours on fine grinding.
Polishing with pitch-tool, which will be described in details later. Using w-strokes like in fine grinding and cerium oxide. Spending about 3 hours.
The abrasive is shifted when the surface is uniform from edge to edge.
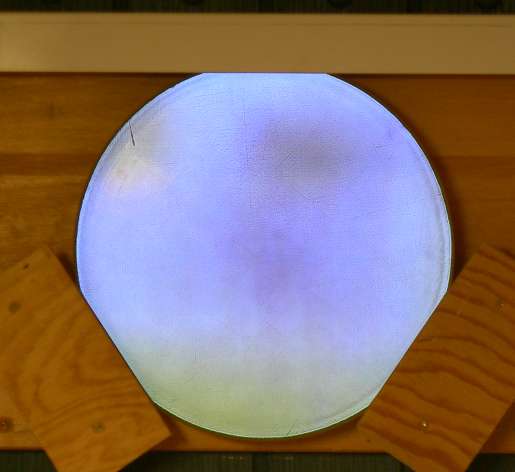
4. juni 2007: Observatory just painted
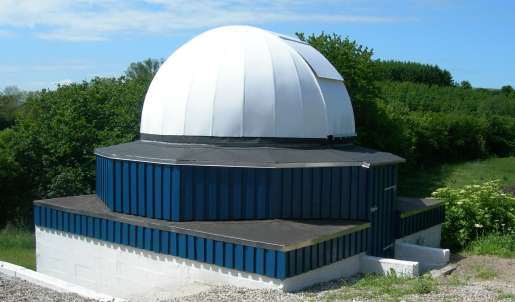
My Observatory is just painted. I like the image in blue, white and green colors:
30. may 2007: Rough grinding
When rough grinding I have experimented and is satisfied with the new tool where I grinding on an iron-plate. Next time I grinding a miror I will get a piece of iron bar. I have linked 75 seconds movie from the rough grinding-proces. I'm using the method described by Texereau and Howard, the file take up 6 mb.
Movie rough grinding (Download Quicktime from this link for showing the file)
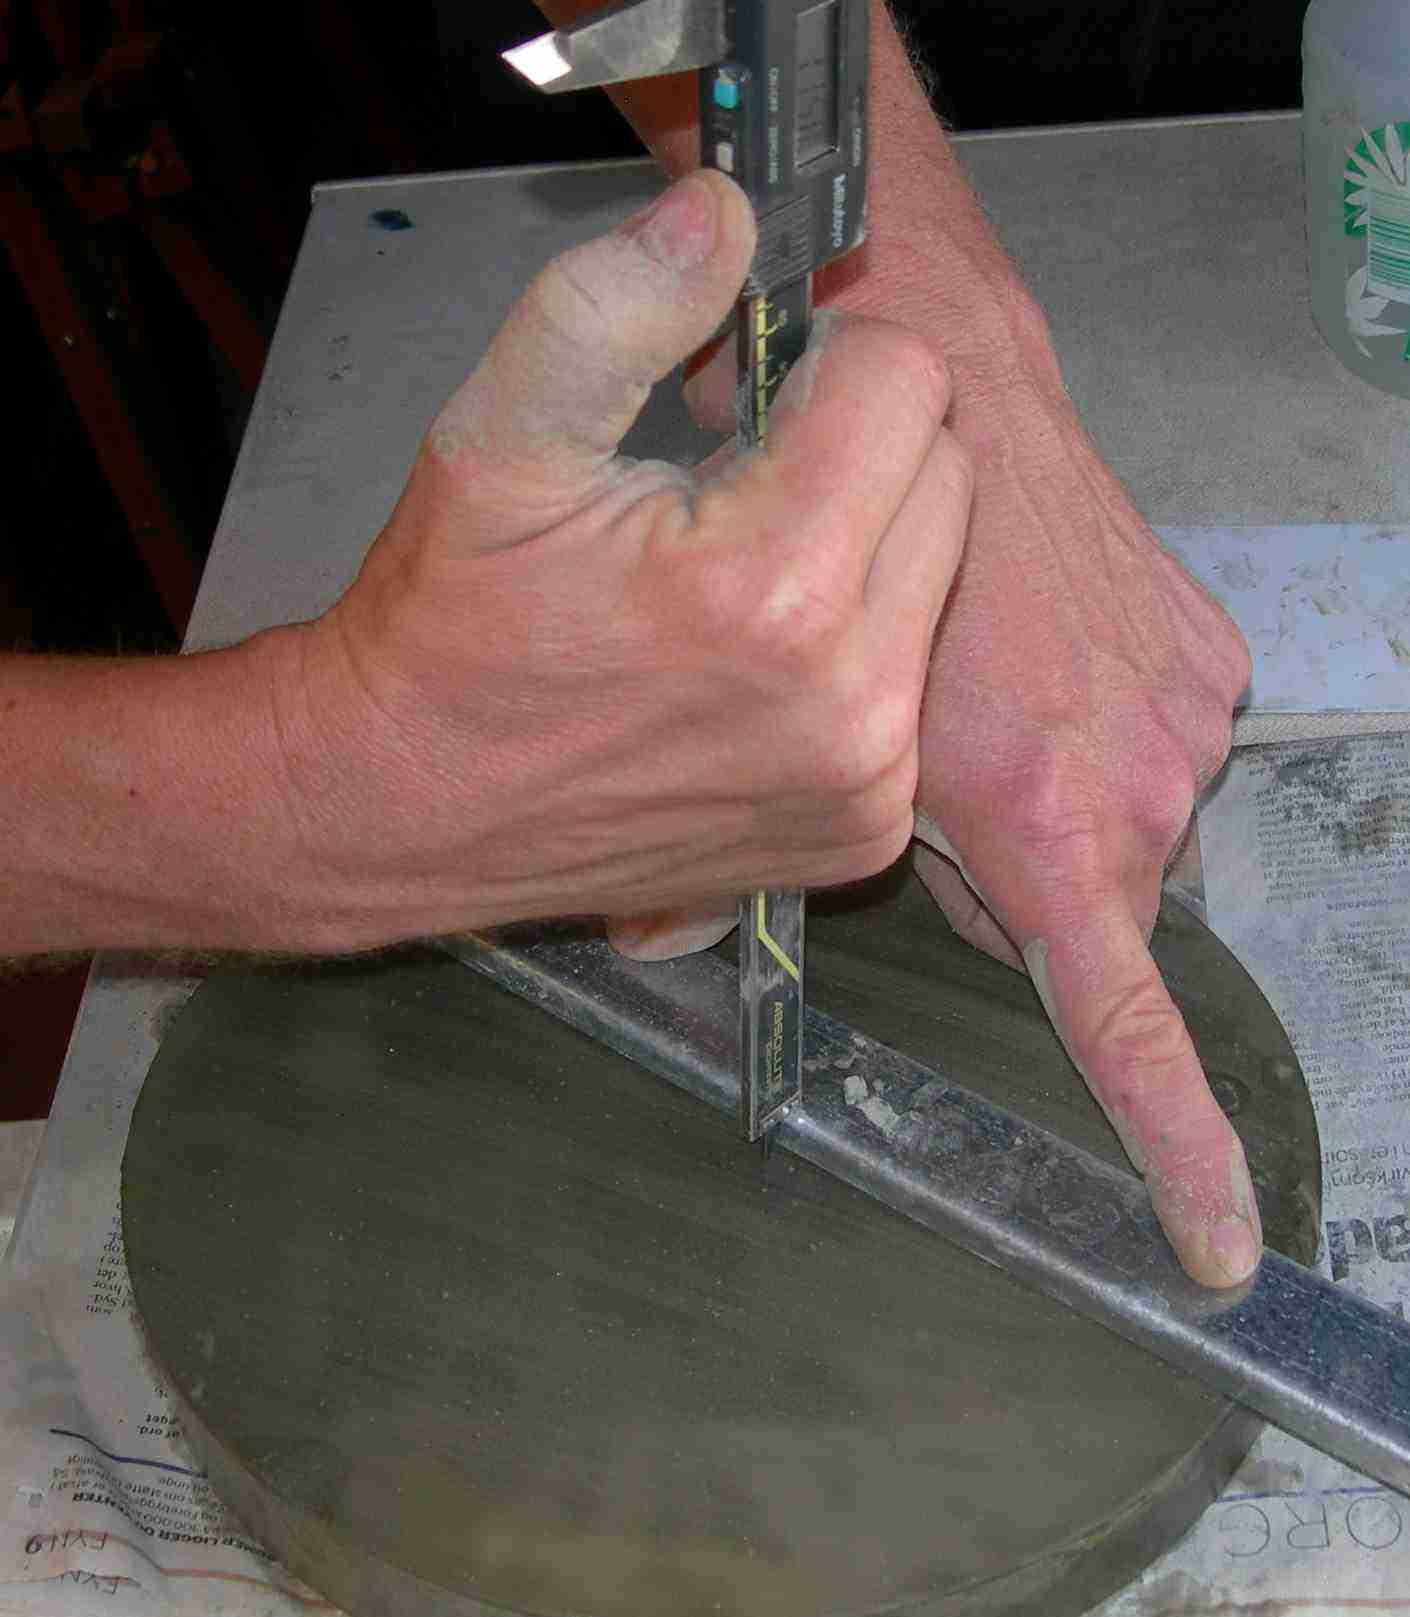
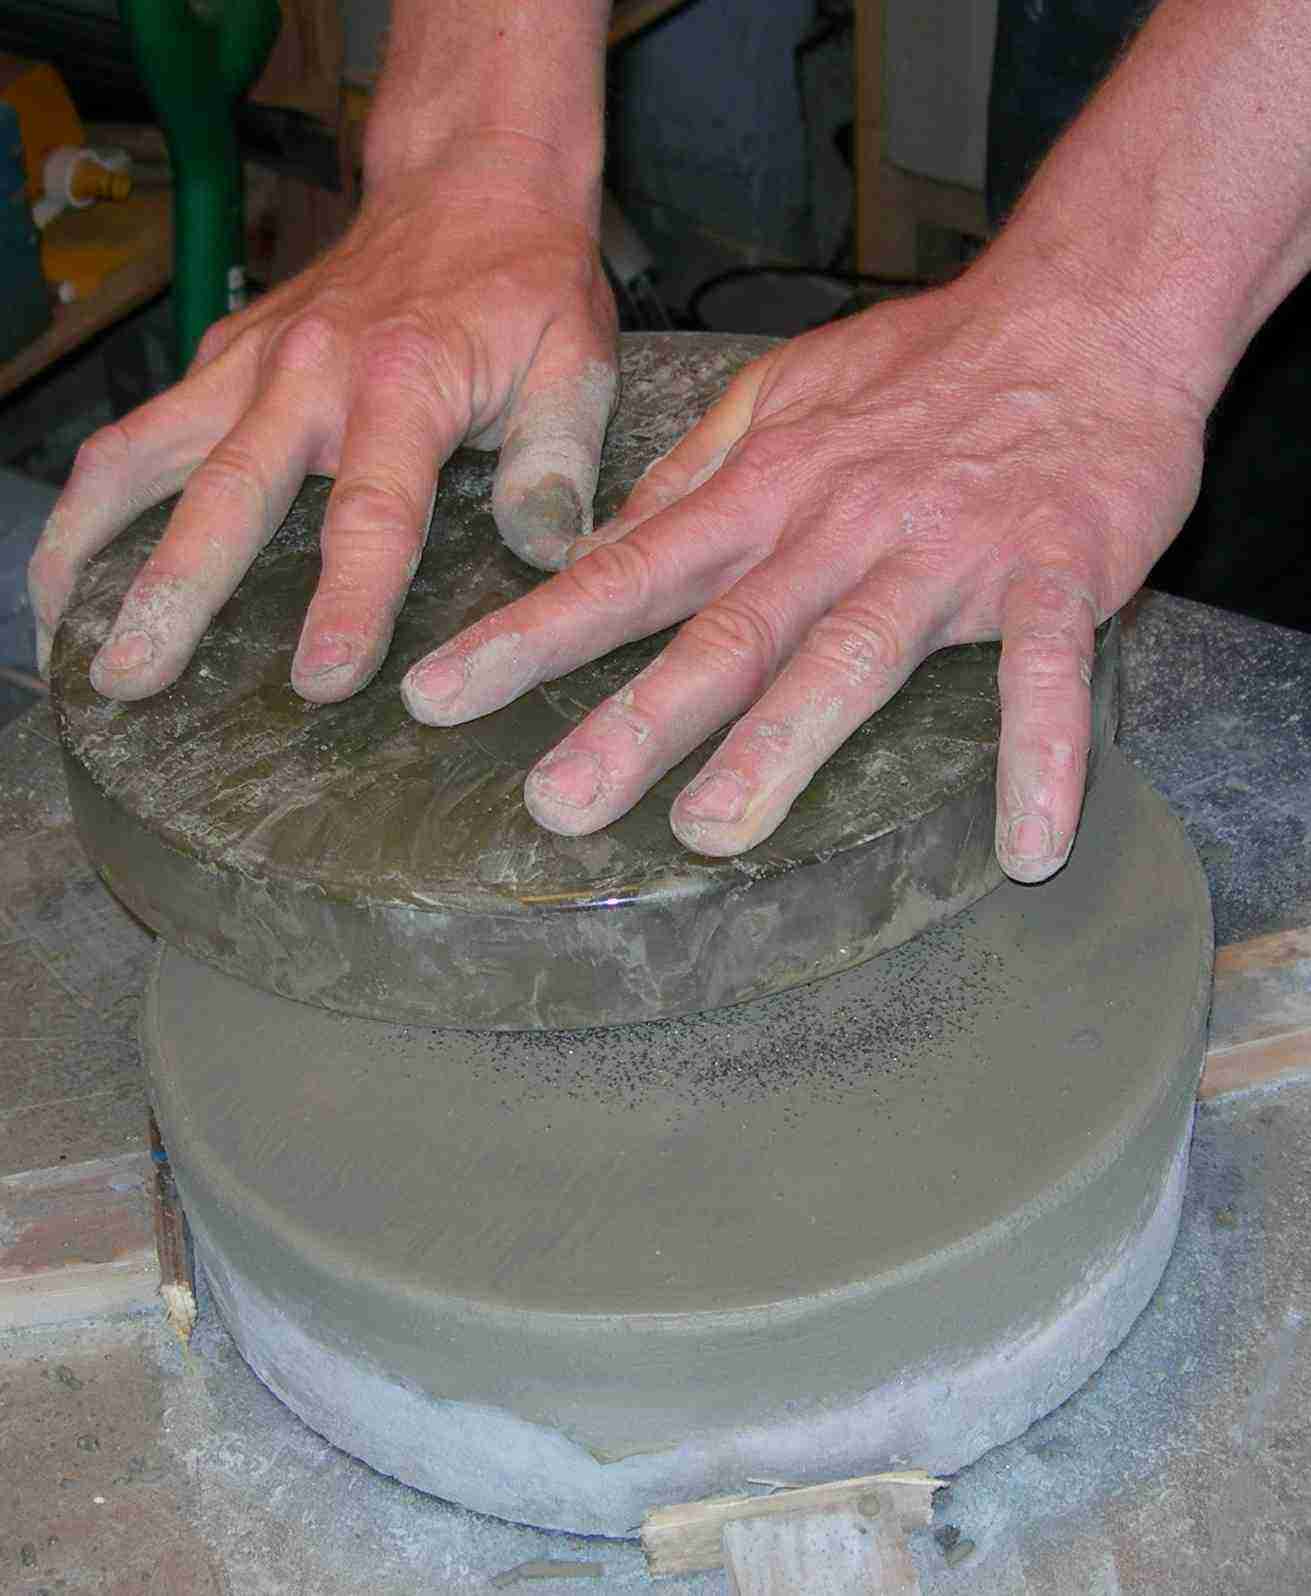
Here is some pictures from the rough grinding, the sagitta (the hollowing)of the mirror is controlled by the slide caliper. The curvature is controled by a template. Adding water and grinding powder to the mirror. The grinding realized by chordal stroke.
24. may 2007: Problems with the tool
I have started grinding of the mirror, but the tool have problems. The concrete dissolve under the grindingprocess, the consume of grinding powder went to heavy and the mirror-grinding don't succeed. I will make a new tool, in iron I have made a 2 mm sheet which will be mounted upon the concrete.
The mirror is grinding on a block of concrete, other ATM's use stone, piece of iron bar, plate glass or something else wich is more hard than the pyrex glass.
After four hours grinding sagitta (the hollowing) is 0.9 mm, it shall be 2.9 mm.
17. may 2007: Describing the proces, methodes and the supplies
To day I write some documentation on what telescope I want to make, the supplies which have to be used and how the mirror will be tested.
The Target:
10" mirror (precisely is the diameter 254 mm), f:5,6 focuslength: 1456 mm. The mirror have to be mounted in a Newtonian with dobson-mounting.
Supplies:
10" pyrex (260 x 36 mm)
Silicon Carbide 60 grade 2 lbs
" " 80 grade 1lb
" " 120 grade 1/2lb
" " 220 grade 1/2lb
" " 320 grade 1/2lb
Emery 125E grade 1/4lb
" " 50E grade 1/4lb
Cerium Oxide 1/8lb
Pitch (Svensk kronebeg)
Tiles
Gypsum
Method or progress of work:
Testing blank for error
Make tool for rough grinding
Rough grinding with carbide 60, 80, 120 og 220
Control sagitta and curvature
Make tool for fine grinding
Fine grinding with Carbide 320, Smergel 125E og 50E
Control sagitta and curvature
Make tool for polishing
Polishing with Cerium Oxide do also control by Foucaulttester
Polish and figurering
How to make test and control:
Template made in plastick, curvature marked by a calipers/dividers, radius of curvature = 2 x focuslength.
Sagitta(S) is the curvature depth in the center of the mirror.
S = R - squareroot(R^2 - r^2) R = radius of curvature = 2 x fokuslength r = radius of mirror.
S = 2912 - squareroot(2912^2 - 130^2)
S = 2912 - 2909,0967
S = 2,9033 mm
Foucaulttester is constructed about a lightsource (a virtuel star) and a screening which do it posibly to analyze the surface of the mirror.
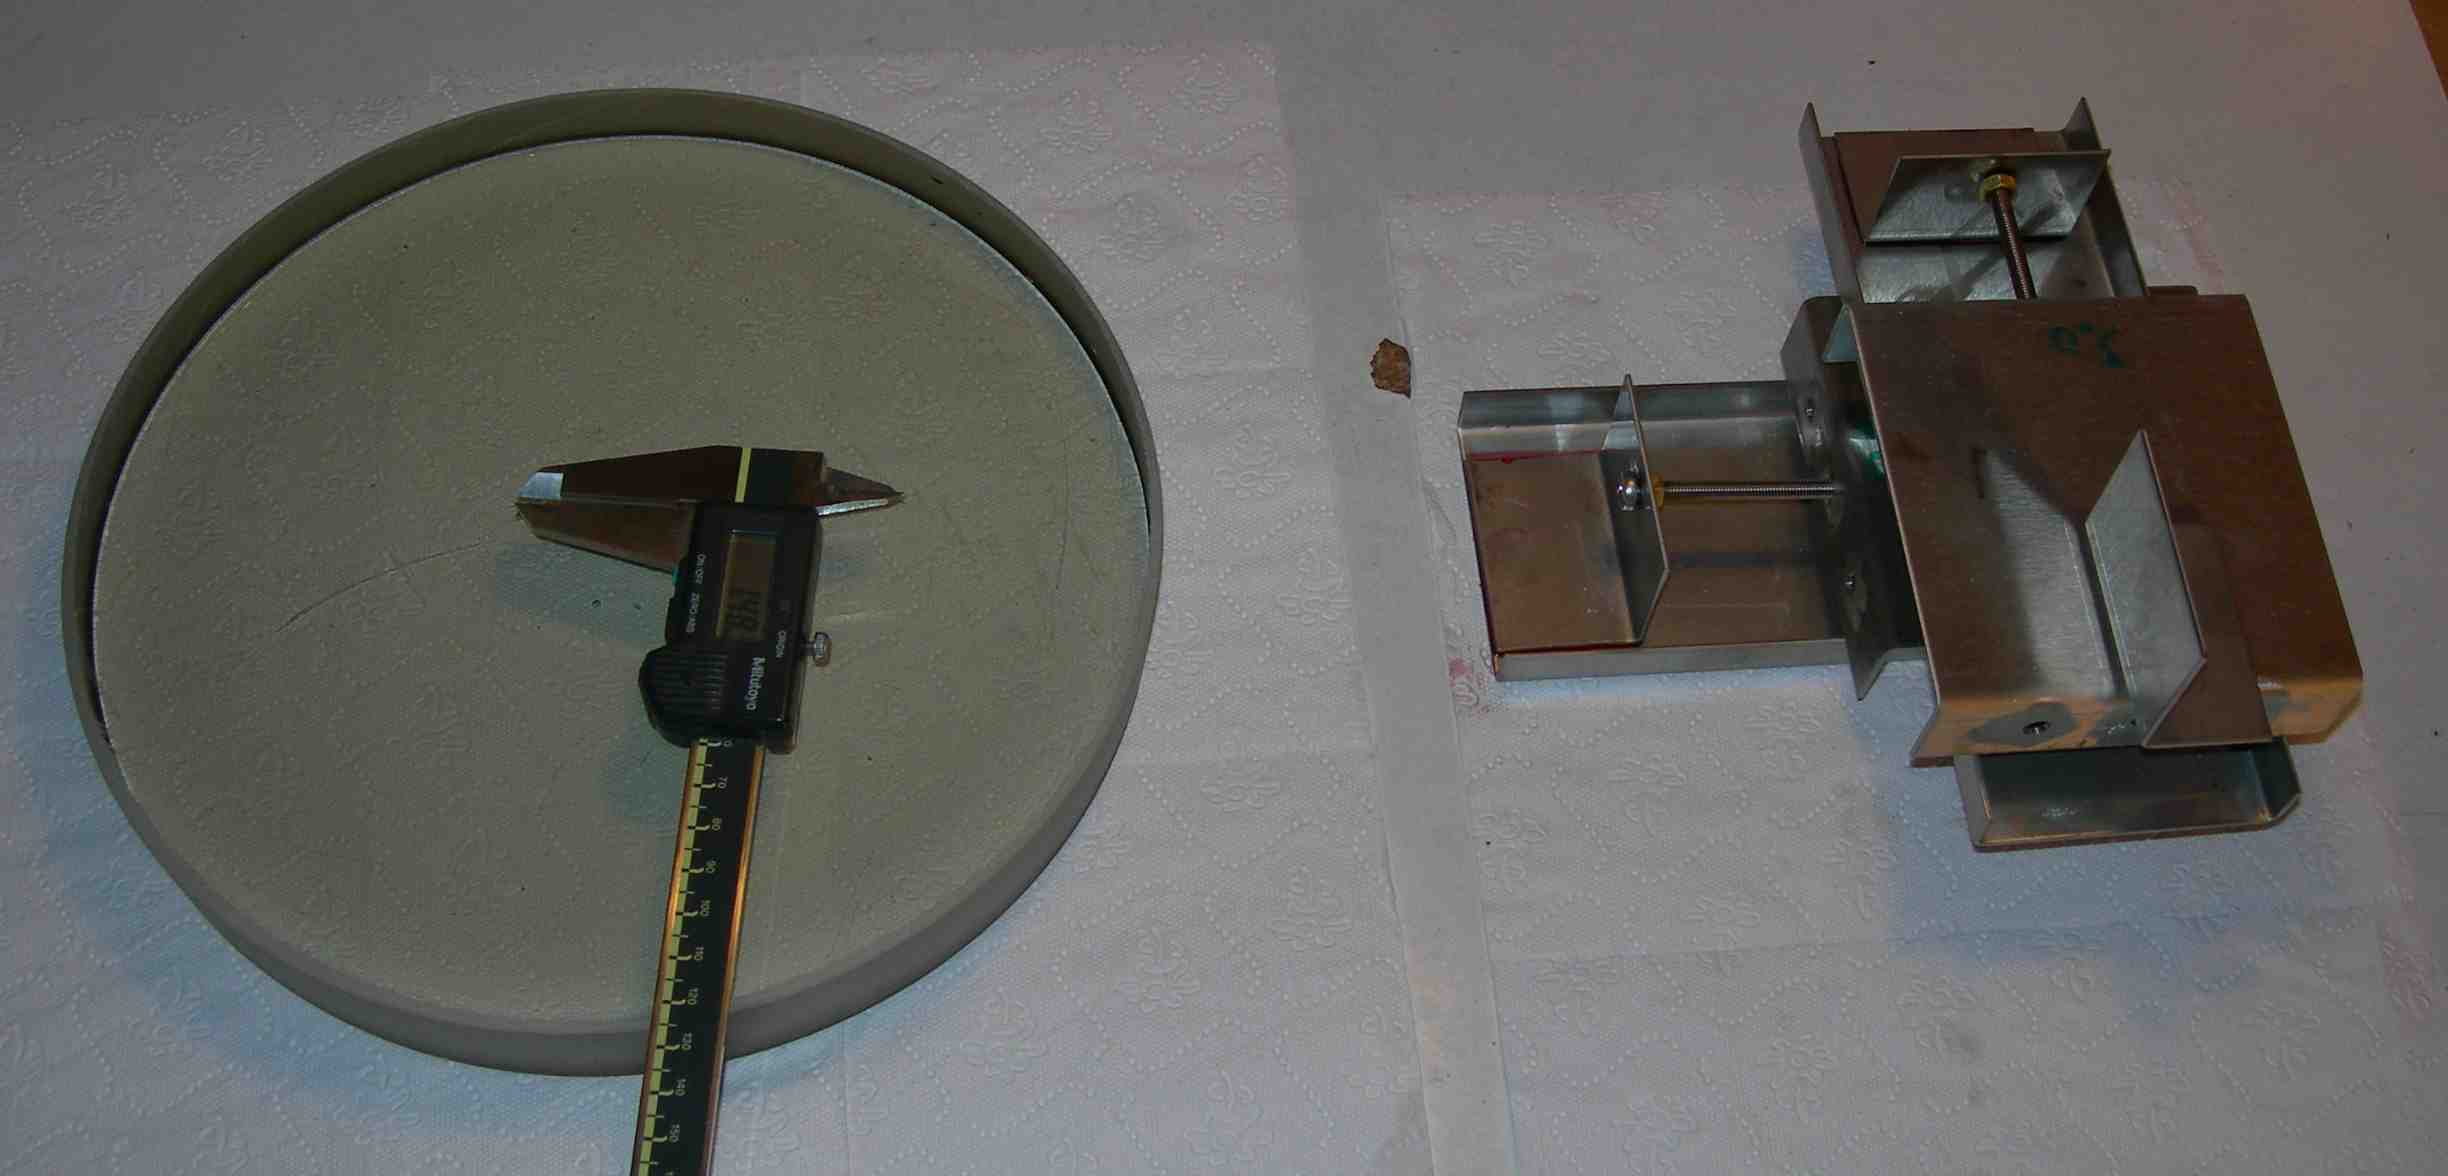
15. may 2007: Mirror has arrived and constructing the Foucaulttester have started
Now I have recieved miror and supplies from Wacuum Coatings in England. And I have started to make a Foucaulttester, it is assembled by two sledges adjusted by a screw.
The mirror is a 10" Pyrex-glas, but there is a little bubble. I think it is 1,5 mm long and is 5 mm beneath the surface. I don't hope it will make troubles. So do an ATM from Denmark say.
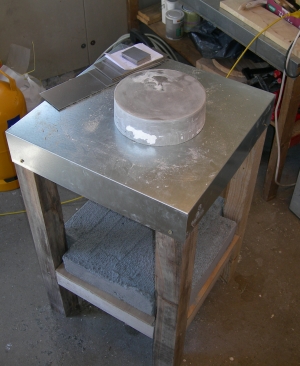
30. april 2007: Tool in concrete
I have ordered supplies from Wacuum Coatings i England. I was recommended Suprax-glas from a danish ATM, but that kind of glass was sold out, so I got a pyrex-glass. When I waiting for the supplies I make a working table and a grinding tool. The tool is made in concrete, have a diameter at 25 cm. and is 8 cm. high. At the picture you can see the tool and behind the tool I have some materials to a Foucault-tester.
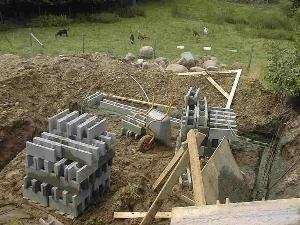
15. april 2007: Construction of the Observatory
I
started to build my observatory in the fall 2005 and in the summer 2006
I finished. I will upload a plan for the building once in the future.
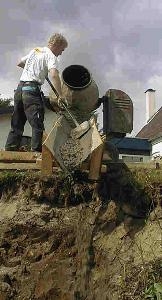
Here is some pictures from the building site, when the foundation/base
was build it looked like chaos.
My oldest son Rasmus
helping with the foundation.
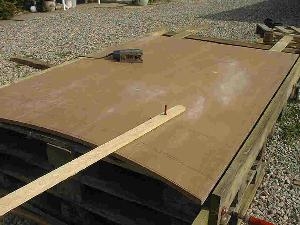
The rib for the dome is marked
by a caliper/divider.
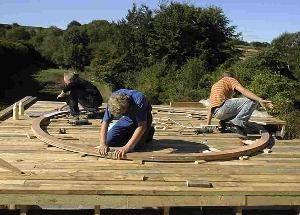
My two youngest sons Jakob and
Emil helping to glue the rib.
Now are the rib assembled and
waiting for the veneer to be mounted.
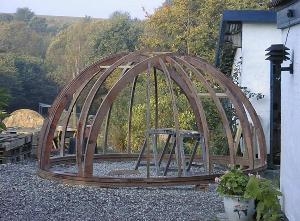
My father-in-law helped with the
roof. And it did also suceed to move the doome around.
